
Carriage clock repair: before and after


This is the result of a full dismantle and clean of this striking carriage clock. As you can see the condition has been vastly improved, removing all of the dirt is essential to prevent future wear after existing deterioration between overhauls has been repaired. Having your clock serviced within the recommended amount of time (for a carriage clock approximately 5 years) keeps all of the working surfaces of the mechanism in top condition and prevents intrusive repair work as much as possible in the future.
Victorian quarter chiming clock video. Jan 2016
Strictly speaking this now counts as off the bench now as its been dismantled, repaired, cleaned and tested. This gorgeous long case victorian chiming clock rings the quarters on 8 bells and strikes the hours on a gong inside its case. Such a beautifully made clock with double ratchet clicks on the chime barrel and so many little features which show the pride in the clockmakers design.
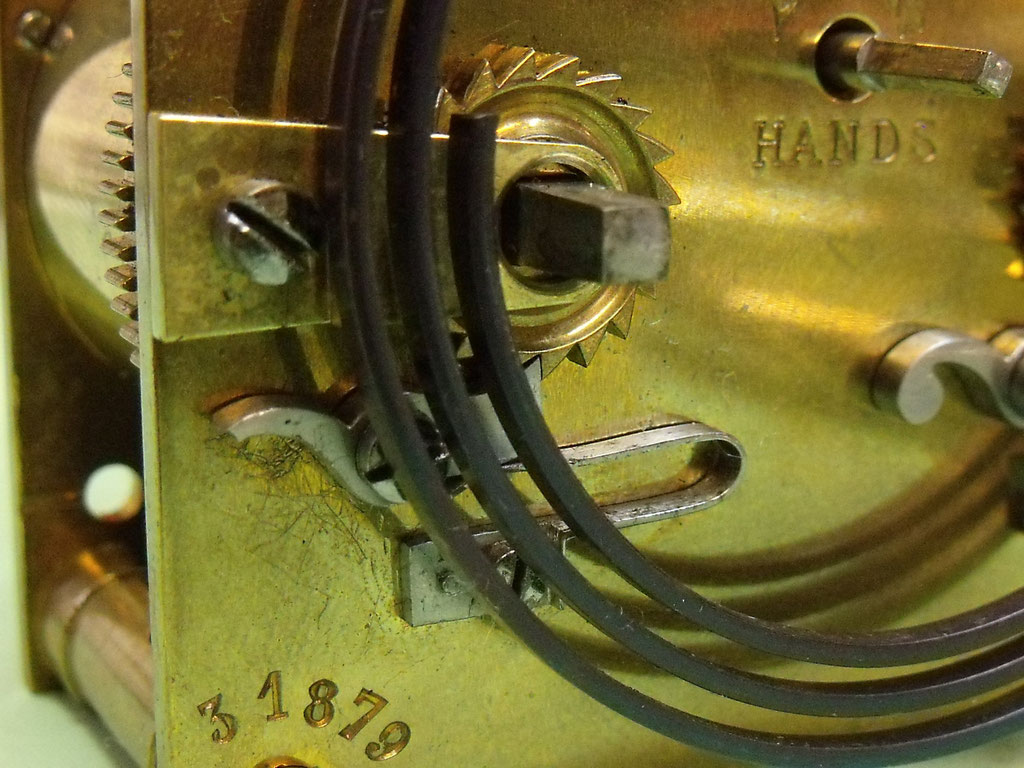
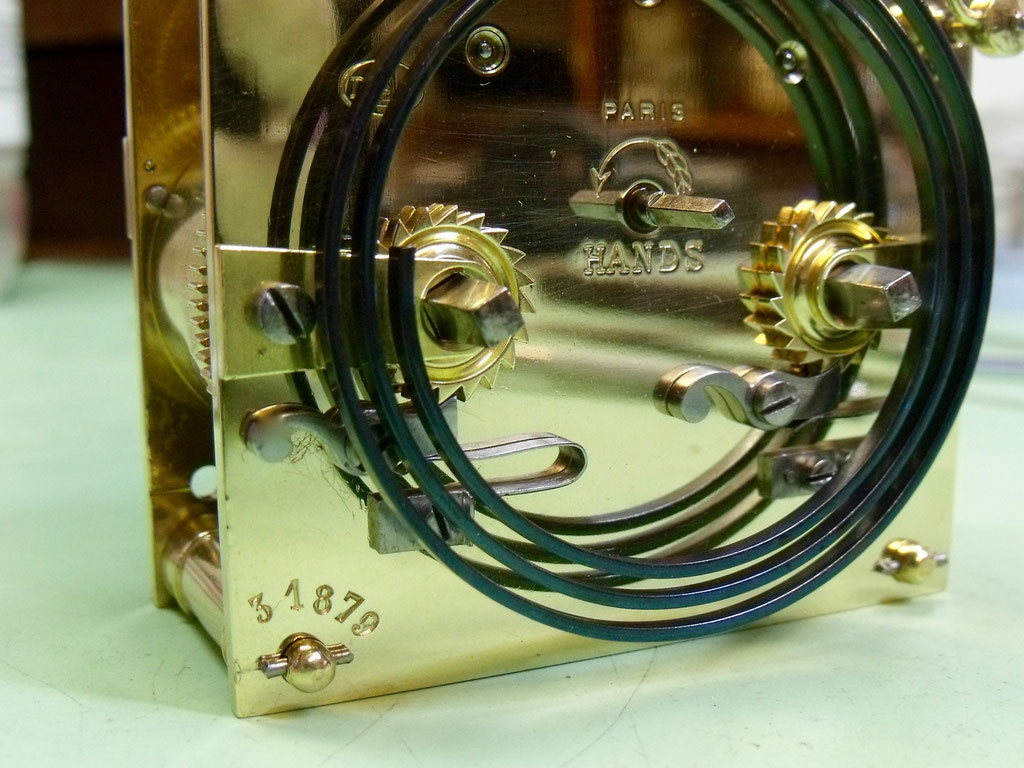
Wheel Barrow Clock.
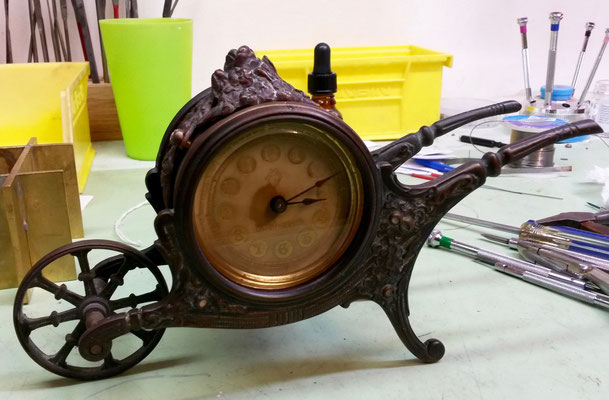
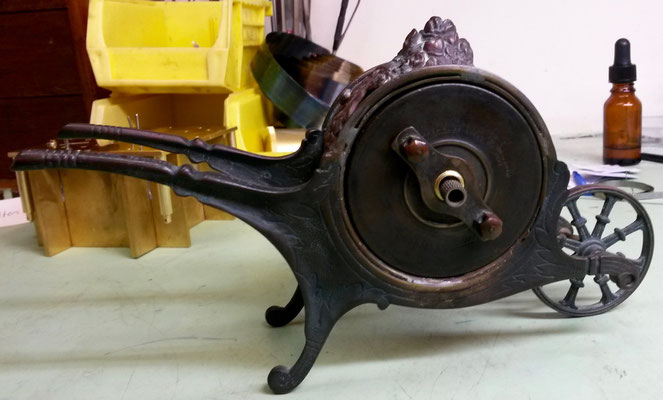
This quirky wheelbarrow clock made by British United Clock Co. from 1890-1900 needed thorough cleaning and repair to its heavily worn pivots and bearings. BUC made a variety of these unusual style cast brass figurative cases. Their identifiable key for winding also secures the back plate which doubles as a barrel cap.
Escape wheel pivoting.
On my bench this week is a french clock from 1840-1850. A broken mainspring has left some damage behind in the form of bent teeth, bent pivots and broken escape wheel arbor. Here is a quick run through of the work involved with repairing the escape wheel
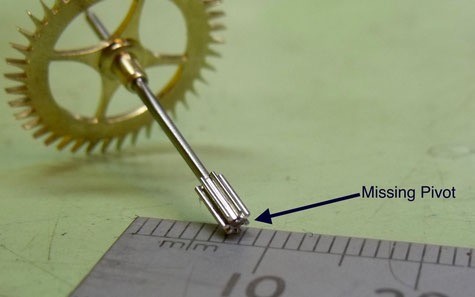
In the case of this french clock escape wheel, it has been damaged to the point that the arbor has severed just next to the pinion. This is likely to be from a shock to the train (in this case its torn mainspring) but for it to fracture at this point rather than at the pivot shoulder suggests a fault or fatigue in the arbor material . The arbor needs to be drilled and a new plug of blue steel turned up and fit to bring the arbor back to its correct length with a suitable size pivot at the end.

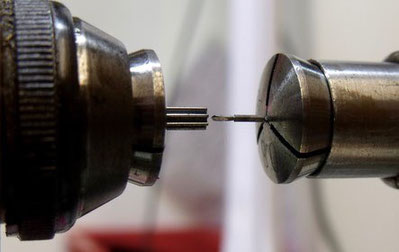
The pinion is delicate and needs to be held securely to insure that the drill can catch exactly in the middle to make sure the pivot runs concentrically when finished. The only way to do this safely is to hold it in the lathe as close as possible at the other end of the pinion, so the escape wheel needs to be removed. The remaining solder is turned off to allow the arbor to pass through a collet which is as close as possible to the size of the arbor.
The pinion is now tempered (softened) and I turn to making a drill. Off the shelf twist drills do not tend to work well in these jobs so I turn and file an appropriately sized one out of blue steel which is then hardened and sharpened. The drill in this case was 0.6mm.
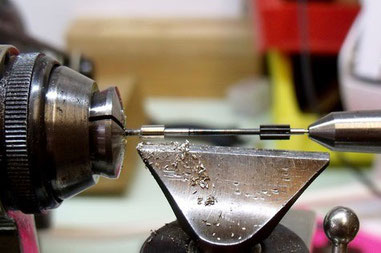
A plug of new blue steel is then friction fit on a taper into the drilled out hole and turned to run perfectly true. The escape wheel needs to be 'recolleted' or rather, replaced back on the arbor in the correct position and perfectly concentric.
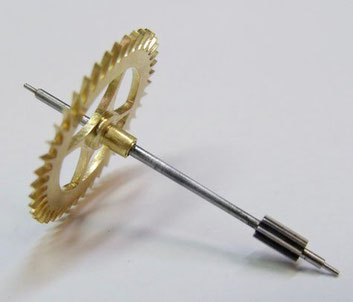
The escape wheel ready to be cleaned up, pivots polished and put back to work in the clock.